
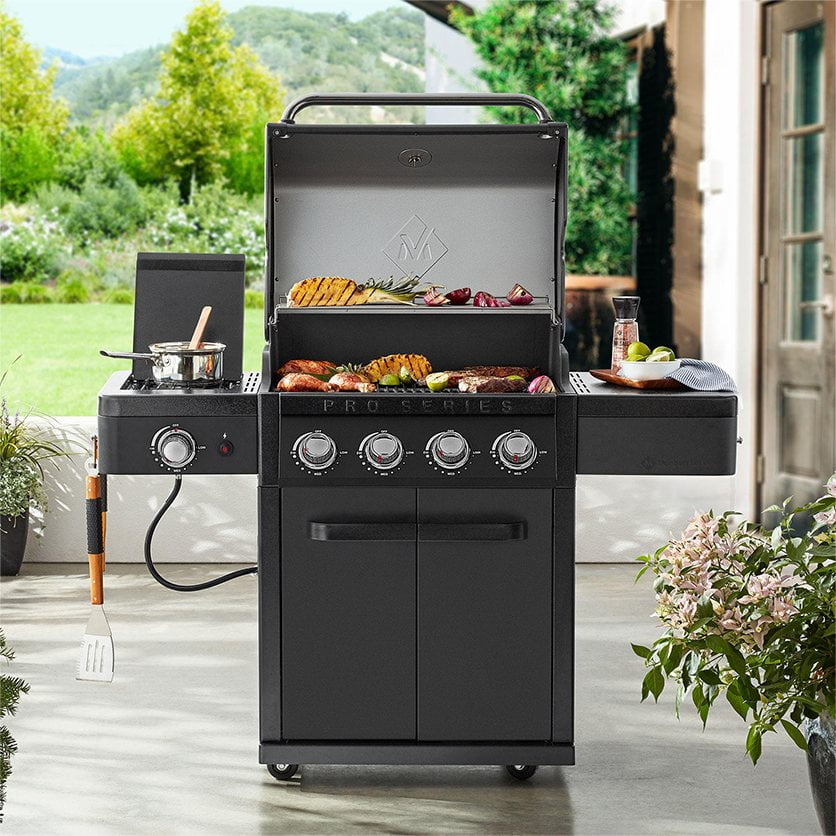
 Customer reviews for Member's Mark Pro Series 4-Burner Gas Grill for
Member photos
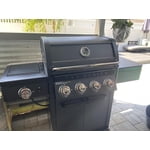
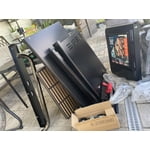

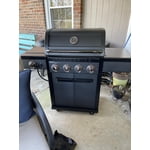


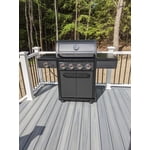 +36 images
Amazing Grill
Bought this after doing much research and price comparing. We had a Weber Genesis for a few years until it rusted to nothing. Checked this out in the Club and was impressed at how heavy it felt. Putting it together took me maybe two hours. Everything went together as it should, there are simply a lot of parts. Not that difficult. Fired it up and it gets hot quickly. Easily peeled the sticker off the lid once hot. Let it burn on high for 15 minutes as recommended. Seasoned the grates as recommended. Cooked steaks and wings in it and it functioned perfectly. Even heat and no flares. Every bit as impressive as the Weber at leas than half the price. Now we’ll see how durable it is over time.
Thank you so much for taking time to give us your detailed feedback! We are so happy to hear that you didn't have any issues removing the sticker. We hope you get many years out of your new grill.
Verified Purchase
Great grill
Great grill, easy to assemble - but time consuming. Use the BUILT phone/tablet app for steps. It is amazing for assistance. Heated up well even with cool temps in the 30s. As others noted, don't remove the sticker on the lid until you heat the grill over 300 degrees. It will come right off and then wipe the lid with a damp cloth while still hot. Only critical comment is th heat shield underneath in the cabinet makes the gas tank a tight fit. Anticipating this grill lasting a long time.
Thank you so much for your review! We have passed on your feedback regarding the heat shield. Thank you for choosing Member's Mark.
Great Grill BUT STICKERS!!!
We LOVE this grill! It was a bit tedious for set up and the STICKERS on the top of the grill were AWFUL getting off! However, the grill is AMAZING and works well. It cooks evenly and is easy for cleanup. Would definitely recommend just be prepared for putting it together and the STICKERS!
Thank you so much for taking time to give us a review! We have made some recent changes to the stickers since we got feedback about the adhesive. We are so pleased that you are happy with your purchase and we hope you get lots of use out of your new grill.
Very Sturdy
This took about 2hrs to assemble, BUT I was in no rush and using blue loctite on screws. Directions were very straight forward. I was a little overwhelmed during the unboxing giving the amount of parts. Just give yourself some room and lay everything out and your good. That sticker on the prep side is a joke! Going forward just tape the advertisement on - NO sticker. The ignitor wires are funky, too many, too much spaghetti, a better design is needed. I believe I can get a solid 4-6 yrs out of this grill. The cover is heavy and thick should protect it very well. For the price I see alot of value in this unit. I believe a 3 burner with a side burner is the perfect size for homeowners. Once put together the grill felt solid, study, substantial I'm very pleased!
Very Good Choice
I bought this grill last week. Only tool needed to assemble this grill is a phillips screw driver. All the nuts are permanetly attached to the grill. Directions are easy to follow, however; I suggest removing the lid from the grill to make it lighter during installation. Remove from each side the ring clips and pins and then set the lid aside till finished. Reattach the lid as your last step. I have used this grill 2x and I believe I made a good purchase.
Thank you for leaving a review and providing feedback. Happy grilling!
Had high hopes
This is my third Members mark grill. The first one I hated because it had problems with propane flow. I had to waste half the tank trying to get it to flow. Then I bought another thinking for sure they had improved. It was just as bad so I actually returned it saying to myself, never again will I buy a members mark grill. So then some years pass by. I see this grill and I love the look and feel and I think surely this has to be a good grill and improved over the years. This thing is beautiful, best looking grill that you can buy. But does it work. The answer is NO. It DOES NOT GET HOT ENOUGH. I can barely hit 450 in the summer and if its cold not even 400 Not sure if its bad design or bad regulator Either way its junk. If you have this grill and you give it high marks then you know nothing of grilling and your steaks likely look like Napoleon Dynamites No Char grease ball. A good grill MUST and I mean MUST get to 600 degrees if you want to char your steaks. 700 if you really want to do it right. Sams club you should fix this. I will be returning my second Members Mark grill and likely my last.
Thank you for taking time to leave a review. We are sorry to hear that you are unhappy with your new unit! The Member's Mark Pro-Series 4 Burner Gas Grill reaches temperatures of +650F. If you are not getting hotter than 400F-450F you may have activated the regulator's flow limiting device. Please follow the troubleshooting steps in your manual to perform and regulator reset. (Page 9)Should you require further assistance please don't hesitate to reach out to us: toll-free at (888) 301-0332 from 7 a.m. to 11 p.m. CST Monday through Saturday and 10 a.m. to 8 p.m. CST on Sundays. Please have the item number from your receipt, the product UPC and/or the product description ready to provide to our Member Care Professional. We would be happy to help troubleshoot over the phone and/or send any required parts right to your home. Hope this helps!
Dented Lid
I bought this grill yesterday and assembled it. It took me about 4 hours and was not too difficult. The build quality is good and the packaging was impressive. I was planning to give it a better rating but when I was about half way through assembly I discovered that the inside panel of the lid was severely dented. If anyone from Sam's Club reads this I would like you to replace that piece. I would like to recommend this but more attention needs to be paid to quality assurance.
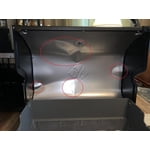
Thank you so much for taking the time to leave a review and feedback of your experience! We are very sorry to hear about the damaged lid. All Member’s Mark items carry a 100% member satisfaction guarantee . If you need a replacement part, give us a call toll-free at (888) 301-0332 from 7 a.m. to 11 p.m. CST Monday through Saturday and 10 a.m. to 8 p.m. CST on Sundays. Please have the item number from your receipt, the product UPC and/or the product description ready to provide to our Member Care Professional.
Defect after a year , Not under Warranty-
I bought in May, 2022 after buying same grill in 12/21. Bought this for a second home, so wasn't used as much. This grill, even though same model and cost $100 more, was not same quality as the first. It now has paint peeling on the firebox, which is NOT part of the warranty. Very disappointed. I did file a claim, and got this as a response =We can recognize some scratches and peeling on the firebox in your photos. We do not carry the firebox as a replaceable part. Regarding the firebox, Any issues related to scratches, environmental degradation, corrosion, fire damage and rust are not covered by warranty. The simplest solution would be to protect the affected area with some heat resistant paint (high heat barbecue paint =Grill still works well, but wondering about rusting. Disappointed about the defect. Is not part of the firebox, but really in the construction of the firebox.
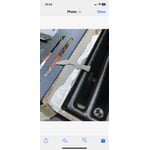
Thank you for taking time to leave a review. We're sorry to hear about the issue you've faced with the paint in your firebox. The good news is that this issue is purely aesthetic, because die-cast aluminum will resist rusting and degradation. High temperature paint will solve the aesthetic issue, should you choose to cover it. The reason we don't replace Fireboxes, is that it would require our customers to have to install important parts such as burners and the manifold assembly which could be very dangerous if they are not installed correctly. Should you have any further questions, don't hesitate to reach out to us at the number on your manual, or by reaching out to the Member's Mark Help Center a call toll-free at: (888) 301-0332 from 7 a.m. to 11 p.m. CST Monday through Saturday and 10 a.m. to 8 p.m. CST on Sundays. Please have the item number from your receipt, the serial number, the product UPC and/or the product description ready to provide to our Member Care Professional.
OUTSTANDING engineering, appearance + performance!
This grill is super solid! Incredible packaging integrity and simple assembly instructions. Built to last with robust design and materials. Extremely generous side shelves and cooking space to accommodate any event. Stout cover for protection from all conditions. I'm incredibly pleased and highly recommended this super star!
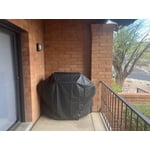
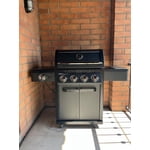
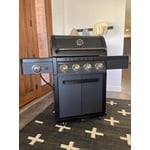
Thank you for taking time to leave a review with your recommendation. Thank you for choosing Member's Mark and happy grilling!
Fantastic Grill
I was very excited to see this at Sam’s Club. Fantastic value with comparable grills from Weber selling for double the price. This is a high quality grill which is a lot heavier than my old Weber. The first weekend of grilling turned out great and very pleased with the purchase.
We are so glad that you're happy with your purchase and you had fun grilling with it.