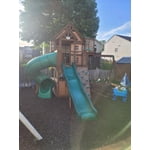
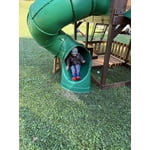
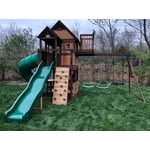
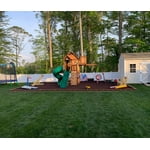
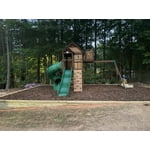
Fairly easy to assemble but time consuming. Here are a few tips to make things easier.
1. Delivery comes in 6 pieces - 4 long/heavy boxes, one large square box (tube slide) and the wavy slide (in plastic bag). Sort all the wood first! I sorted by part numbers/letter (ie., G38, F45 etc). The numbers are stamped in black ink before the wood stain is applied and are hard to read. Using white chalk to mark the number on each piece (of dark stained wood - the lighter wood was MUCH easier to read part numbers) was time consuming initially but made things go much faster once we started assembling.
2. Read the warranty rules! According to the warranty, the wood needs to be sealed or the warranty is invalid. Of course, I didn't notice this until after the swingset was assembled, which means sealing it will be a mjor PITA (the roof is 12 feet high!). It would have been much easier to seal each piece as it was inventoried.
3. When assembling the roof support brackets (v-shaped), instructions call for drilling a pilot hole on only one side to avoid splitting. I did this but the other side started to split. After repairing the split (glue, clamp, let dry), I drilled the pilot hole through both pieces (after fitting them together with clamps) - no problem with splitting.
4. MAKE SURE YOUR SITE IS LEVEL! This is especially important with the swing arm support assembly! My husband didn't notice that neither corner of the support assembly touched the ground (off by 1-2 inches) which causes A LOT of movement and creaking when swings are in use. It also renders the ground augers useless.
5. Have a system for keeping track of hardware - there is a LOT of it!
6. The system we used for assembly made things go smoothly:
After sorting and labeling wood pieces, I grouped the pieces needed for each step and put all the hardware in ziplock bags labeled with part numbers. (To avoid confusion, similar parts were put in separate bags). Bags were reused when emptied but we still used 25+ baggies. A sharpie works great for labeling the bags - you can reuse for the same part numbers and/or cross out old numbers. We used two 6 foot folding tables - one for sorting hardware etc and the other for putting wood/hardware in groups for each step. You'll receive two instruction manuals - one in english, the other in french/spanish. My husband used the english version for assembly while I used the french version to sort parts for each step. The part numbers are the same in both languages. I also highly recommend using the Bilt app. It shows step by step instructions and you can move the pictures around for better viewing. It's great!!
Sorting and chalk-labeling the wood took me several hours but made a HUGE difference when it came time to assemble the swing. Most of the instructions are pretty easy to understand and there is a parts list at the top of each page for that step. Once we got started on the actual assembly, it took my husband and I two 8-hour days to build the swingset and neither of us is young (55) or experienced. It helps to have two cordless drills so one can build the stairs, climbing wall, and porch roof while the other works on the main unit.
Of all the wooden pieces we received, only one had minor damage (small crack) but since it didn't effect appearance or integrity we used it. CHECK the tube slide pieces before you begin! The flanges on four of ours were cracked (box was probably dropped during shipping) and had to be replaced but customer service was AWESOME. I used the chat function on Backyard Discovery's website and the parts were shipped out same day at no charge.
All in all, it was a fun project and our grandsons LOVE their new swing!
****Four stars only because the numbers on the dark stained wood are very hard to see and can be confusing because of the font used.

 Customer reviews for Backyard Discovery Skyfort III Cedar Swing Set with Tube Slide for