Customer reviews for Backyard Discovery Skyfort II Cedar Swing Set/PlaySet forMember photos


+874 images
Making memories
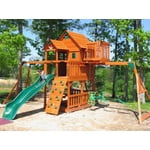
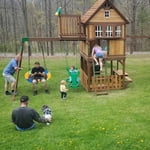
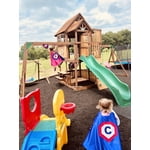
We made a good selection. Parents and kiddos are very happy with Skyfort II. We used the instruction manual along with the Bilt app when building and we had this playground up in a total of 22 hours with the help of 3 other men. I had everything sorted in letter groups then put them in sections ie: fort, crows nest, swing and monkey bars. So easy to locate the parts for each section of the playground that way and I think that's why it was built so quick. We had one peice that was split so I called Backyard Discovery and with little hold/wait time I ordered the peice along with a new telescope with no issue. Ours was warped. I had ordered through another company, an infant swing and a play phone. Both green and it matches the sets other peices. With our children who are 18mths, 4yrs, 8yrs and 11yrs, they will enjoy this set for a long time. Mom even climbs up the crows nest with them. She is 5'7 and can stand straight up deck portion of the fort. Dad is 6'3 and he stands straight up in the middle of the main fort house. Lots of room and not short or small playset. This is must!! Making memories
Great playset!
We set the playset up a couple of weeks ago and the kids love it. They are 6 & 8 and I was worried they might grow out of it too fast but I now feel confident they will play on it for several years. We didn't have any issues with boards breaking as we saw in some of the other reviews. My husband said it is made of cedar and cedar is a soft wood, not a hard wood. We are very happy with our purchase.
Great play center for the kids
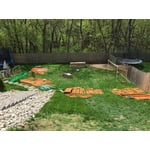
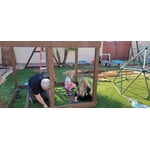
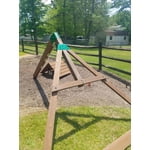
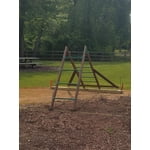
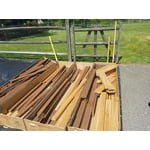
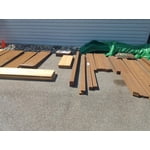
I bought this set in August of 2015 at the end of the season to get a better price. Finding after the set was built that the original price would have been well worth the money. I actually did not build the set until April 2016 after some rainy and cold weather kept me from starting on it as soon as I received it. After sitting for 7 months the wood was still in perfect condition and very easy to work with. While deciding which set to purchase I read and researched a lot of reviews of the set. I actually found quite a few that were really detailed and helpful, although I had to be careful because some of them were for the earlier model and the instructions are different for each one. I think the most helpful was a review that suggested using sandwich bags to separate the hardware for each step. Take time to go thru the instruction book page by page to familiarize yourself with the steps. As you do put the hardware for each step in its own baggy and label it for that step. It will take you about 4 to 5 hours to do this but it is worth it as it makes the steps go faster while actually building, not having to take time to pull the hardware for each step as you go, plus it inventories the hardware so you know if you are short on anything before starting. Separating the boards is a must. You will need a lot of space to do so. I had a space in the very back of my yard that we spread a trucker tarp to lay them on and put another over them so if it rained during construction the boards would not be sitting in water until used. As you inventory the boards, putting them in alphabetically order, then putting each letter in numerical order is very helpful with time spent building. Each step is detailed as to which boards and hardware is needed, but please be careful to pay close attention as to the orientation of the boards. Most have predrilled holes that will need to be in the right places for following steps. In some steps it is difficult to see which way the predrilled holes are supposed to go, but if you look ahead a couple steps to check where other boards might intersect with that board it will help to make it clear which way to position it. If you are careful and make sure each board is positioned correctly there is no need to drill guide holes except in the few places where the instructions actually tell you to drill a hole. The building process was easy. Being a truck driver my husband is on the road a lot so I built the set by myself. The first weekend consisted of 5 hours on Sunday, after spending Saturday separating the boards and hardware. The week was only 1 hour after work on Monday, Tuesday and Wednesday, got rained out on Thursday and Friday. The second weekend was 8 hours on Saturday and 6 hours on Sunday, 1hour after work on Monday, with the finishing touches (attaching the slide, rock wall, ladder and swings) being done in 1 1/2 hours after work on that Tuesday. A total of 23.5 hours. I feel like having a helper would have only been someone in the way. Having two "A" ladders was very helpful though, as I used them to hold the swing bar up while I attached it to the play-set. And it also eliminated the need to continuously move one ladder from side to side while working. I bought the optional floor that covers the sand box area. I had some issues with this part of the building process. While installing I had to cut the two end pieces, they were about 1/2 of an inch too long. I also discovered that the predrilled holes were measured incorrectly on the floor boards. When the factory drilled the holes they fell right at the edge of the board they were to be attached to instead of in the middle of it. Problem solved by screwing them in at an angle and the extra floor space allows for a bigger play area without the worry of sand and dirt. I also did not use the monkey bars, grandkids still a little young for those. Instead I called Backyard Discovery and ordered another M1 and 4 more M24s to make where the monkey bars would go enclosed like the opposite side (Step 37). Helpful suggestions: If you do get the optional floor….Do NOT install the L2 boards in step 6 (of the play set instructions). DO install the optional floor before you do step 18, in which you will have to cut O2 to fit above the floor board. I then bought a little L brace to attach O2 to the floor board. In step 55 before attaching the J2 boards it would benefit you to go to step 58 and attach the two M25 boards to the J2 boards before attaching the J2 boards to the crow’s nest bottom. If you attach the J2s first, when you go to attach the M25s the roof will be in the way of being able to screw the screws in. The only Con that I can honestly say I see with this play set is the sliding board. It was very difficult to put together and does not seem sturdy. I wish it had come with the one piece thick plastic slide I saw with some of the other sets. I do not think it will last very long. The rest of the play set is very sturdy. I weigh 190 lbs. and while constructing this set I climbed all over it. Once the second floor floorboards were installed I stood on them to continue to build the upper level of the set. I even had to climb into the crow’s nest to build part of it. None of the boards felt like they would break under my weight. After replacing one of the swings with a baby swing, all of the grandkids can and will enjoy this play set for years to come. I added some pictures of the building process.
Almost perfect
Important to line out all parts and fasteners in order, even if it takes a few hours. Went together very well, step by step. I would consider assembling the crows nest completely on ground first. Bolts 090 or 091 may have been mis-labeled, but no biggie. I used ratchet straps to put the slide together by myself, and to keep the frame square during assembly. I hammered in 3' metal post to use for anchors due to high winds in my area. Intend to use green labeled Thompson Water Seal to spray on. This took me 5 days to casually assemble by myself.
So many great aspects
This is a great swing set. SO many pieces! You know there will be... but you really dont understand until you have them all laid out just how many pieces (or how it fits in 4 boxes). - This is by far the best bang for the buck. I knew we wanted one with monkey bars (my kid loves monkey bars) So this was by far the best one that incorporated them. Note: these monkey bars are HIGH. My 4 year old is not allowed to do them without her dad to help (at 5ft tall -i am just not tall enough to help her)- Luckily so far she has abided by our rule- we told her they would be boarded off if she didn't. - The fort is super sweet, really big. - I wish you guys sold something to use as a cover for the sandbox. - I dont love the slide, the waves in it kinda make for an unpleasant bumpy ride (almost feel like you are being launched) lol but it doesn't seem to bother my daughter.. A straight one would be better though.. I went back and forth on if this was a 4 or a 5... If i were to give it a 4 it would be based on how high those monkey bars are.. even for older kids- The height could potentially cause some issues if they fall. I gave it a 5 though- cause it really does deserve it.
Love this Playset!
We have had the Skyfort II for a year now and it has been a blast for the kids. My 10 and 3 year old play on it everyday and it has held up wonderfully, very sturdy and still looks great. The instructions were very detailed for assembly as well. It was well worth the time we put in building it. Whenever their friends come over that is the first thing they go to. I am very pleased with my purchase.
9.5 Kids Approve!
I bought this set because it had all the things I wanted (a fort, monkey bars, rock wall, and several swings). It wasn't scheduled to arrive until next week but I was beyond estatic when it arrived early! My husband worked on it a little after work (because I have 4 under 5) and, due to some lingering light, i helped after kids went to bed we had it up in a week. not bad concidering it was essentially 1 person putting it together. Piece of advise would be to sort the pieces as you open the boxes, they are in there any kind of way and don't assume that all of 1 piece is in the same box. My husband tried to jump on it but I hadn't had a chance to sort it out yet and it was kind of a cluster. BUT I sorted it all out and got everything back on track during nap times so we were good to go on day 3 (was a saturday so 1st full day of work). Once you start getting it together and the pieces are orgnaized it really doesn't take that long and goes together smoothly. Also, pay very close attention to the instructions. My husband actually preferred the book to some app he found because apparently they didn't give the exact measurements of spacing and the alignment of the holes. In the long run, I had 5 10 yos, 8yo, 5yo, 4yo, 3yo, 1yo playing on it during a birthday party today and it held up beautifully and they all seemed to have an amazing time. I may end up getting some more boards to close up the other bottom of the picnic area because I really am NOT feeling sand or try to find some other cool use for it... maybe a childs hammock... but GREAT PURCHASE!
What a helpful review. It sounds like you were so organized and how nice you are to pass along the tips. You purchased one of our best sellers and we know you will have many years of fun.
Easy Assembly Method
[This review was collected as part of a promotion.] Started this project Wednesday and placed the last bolt on Friday totalling to about 15 hours. Our Method: The builder The organizer The organizer will need to lay all 4 boxes out (the parts are scattered) and organize them by letters then numbers. The organizer will keep the book and have each step with the parts ready for the builder (this helps by avoiding over looking steps) while the builder is working on that step the organizer will prepare the following step. Once the builder completed that step the organizer will take a quit glance and ensure the step is accurate. (This helps overall accuracy) The builder will download the BILT app on their phone and use that as a secondary instruction manual with step by step and 3D animated instructions. The builder and organizer will continuously be on the same step. This method helps ease the stress. There builder doesn't have to worry about scrambling everywhere looking for parts and the organizer doesn't have to worry about the labor. This splits the work and stress down the middle. Before you know it your done. Note: Be careful with the T-Nuts as they have sharp claw edges. I sliced my finger on one when drilling the bolt into it using my hand as a guide to keep it secure it warped on me, spun and flew off while cutting my finger, ensure you hammer each T-Nut in the hole before applying the bolt with the impact wrench or drill, at times you may want to hammer the T-Nut further into the wood than just flushed, this will help it remain secure when torquing the bolt down. If the T-Nut does catch correctly it will spin against the wood and the T-Nut is warped. Use a ladder when you start the crows nest area, it's much safer and you'll have more room to work. Good luck.
Lots of Features
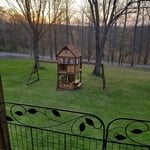
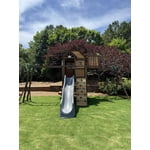
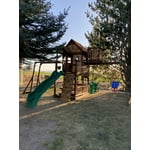
We had it in the garage awhile before we built it. It went together fairly easily. We We did a lot of prep work in water sealing each board and sorting parts which allows us to do most of the build in one 9 hour day with 4 people. It isn't quite finished in this picture but if you look closely, you can see that even the cat likes the hideaway.
Outstanding purchase!
We bought our set last summer. It took a full day to put together, but the hardware and and pre-drilled holes made it a smooth process. The instructions were clear and easy to follow. The kids love it and we have had no issues at all. Great quality and durability, plus it looks really nice in the backyard. Two of our neighbors have since purchased the same set after we recommended it. One had some damage from a wind storm and the company shipped them replacement parts quickly and free of charge. You can’t beat that customer service.